Publishing an app on the Apple App Store sounds simple until you actually do it.
Most tutorials stop at:
“Archive your app and click submit.”
That’s not the hard part.
The hard part is:
avoiding rejection,
configuring certificates correctly,
handling screenshots and metadata,
preparing privacy requirements,
and making sure your app is production-ready.
This guide covers the full process developers actually deal with when publishing an iOS app in 2026.
Whether you're using:
React Native,
Expo,
Flutter,
or native Swift,
the App Store workflow is mostly the same.
Step 1 — Create an Apple Developer Account
Before anything else, you need an Apple Developer account.
Without it, you cannot publish apps to the App Store.
What You Need
An Apple ID
Two-factor authentication enabled
Annual Apple Developer subscription
Current Cost
Individual account: $99/year
Organization account: $99/year
If you're building apps under a company name, use an organization account from the start.
Changing later is annoying.
Step 2 — Prepare Your App for Production
A lot of developers rush to publish an unfinished app.
That’s usually a mistake.
Before submission, your app should have:
Minimum Production Checklist
App icon
Splash screen
Privacy policy
Terms of service (recommended)
Stable navigation
Crash-free onboarding
Loading/error states
Real device testing
If your app feels unfinished, Apple reviewers notice immediately.
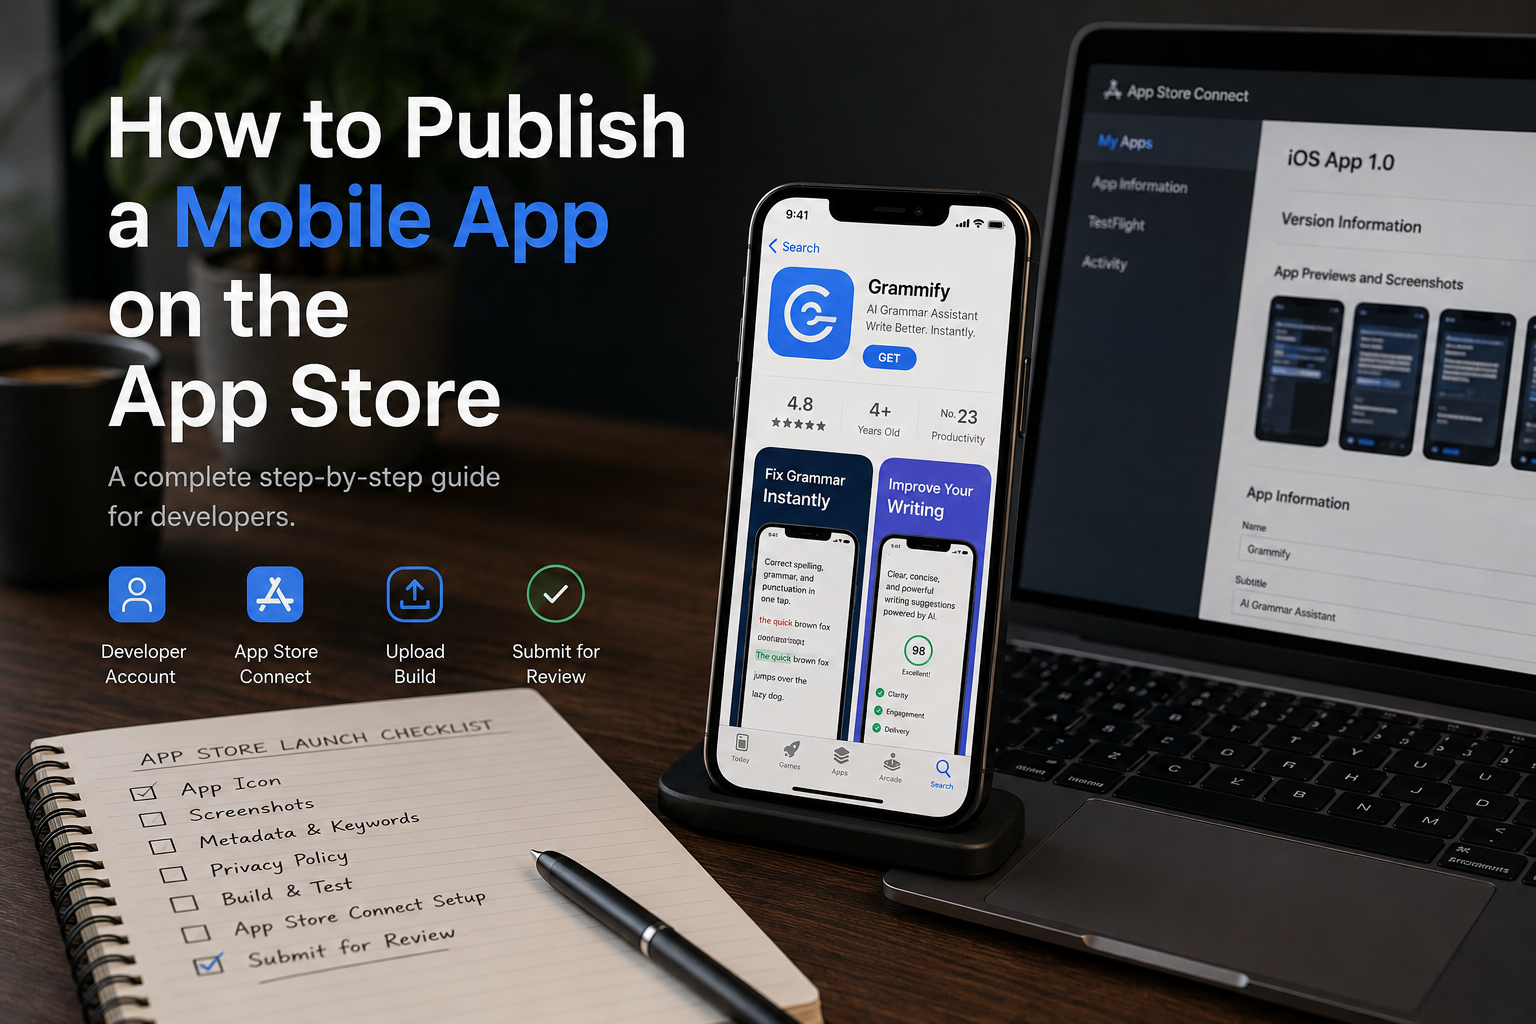
Step 3 — Configure App Store Connect
Apple uses a platform called App Store Connect to manage applications.
Inside App Store Connect, you will:
Create your app listing
Upload builds
Configure pricing
Add screenshots
Submit for review
Important Metadata You’ll Need
App Name
Keep it simple and searchable.
Bad:
Super AI Ultimate Productivity Tool 2026Better:
GrammifySubtitle
This matters for App Store SEO.
Example:
AI Voice Transcription & Grammar AssistantThis is where long-tail keywords become important.
Step 4 — Optimize Your App Store Keywords
Most indie developers completely ignore App Store SEO.
Huge mistake.
Apple search traffic is real.
Instead of targeting broad keywords like:
AI
Productivity
Editor
target long-tail phrases like:
AI voice transcription app
grammar correction app for students
speech to text app for meetings
multilingual transcription app
These keywords convert better because:
competition is lower,
intent is higher,
users know what they want.
Step 5 — Create High-Converting App Store Screenshots
Your screenshots are not decoration.
They are marketing assets.
Most users decide in seconds whether to install your app.
Bad Screenshots
Random UI
Tiny unreadable text
No structure
Good Screenshots
One clear message per screen
Large readable headlines
Strong contrast
Simple layouts
Example:
Transcribe Voice in 40+ LanguagesAnother:
Fix Grammar Instantly with AIYour screenshots should explain the product without requiring users to think.
Step 6 — Handle Privacy Requirements Correctly
Apple is strict about privacy now.
Especially if your app uses:
camera,
microphone,
tracking,
analytics,
location,
AI APIs,
or user accounts.
You must:
declare permissions correctly,
provide a privacy policy,
explain data collection.
A missing explanation can trigger rejection immediately.
Step 7 — Build the Production Release
Depending on your stack:
Expo / React Native
You’ll typically use:
eas build --platform iosNative iOS (Swift)
Use:
Xcode
Archive build
Upload to App Store Connect
Step 8 — Common Reasons Apps Get Rejected
This is where many developers fail.
Frequent Apple Rejections
1. App Feels Incomplete
If your app looks like an MVP prototype, rejection chances increase.
2. Broken Links
Privacy policy links must work.
Always test them.
3. Placeholder Content
Never leave:
Lorem ipsuminside production builds.
Sounds obvious.
Still happens constantly.
4. Login Problems
If reviewers cannot access your app, they reject it.
Provide:
test credentials,
demo accounts,
onboarding instructions if needed.
5. Subscription Confusion
If you use in-app purchases:
pricing must be clear,
auto-renewal must be explained,
restore purchases button is required.
Step 9 — Submit for Review
Once your build is uploaded:
Add build to App Store version
Complete compliance questions
Submit for review
Review times vary.
Typical approval time:
1–3 days
Sometimes faster.
Sometimes much slower.
Step 10 — Post-Launch Is More Important Than Launch
Publishing is not the finish line.
It’s the start.
The real work begins after launch:
user feedback,
crash monitoring,
retention,
App Store optimization,
analytics,
iteration.
Most apps fail because developers stop improving them.
Final Thoughts
Publishing an app on the Apple App Store in 2026 is not technically difficult.
But it is detail-sensitive.
Small mistakes:
metadata issues,
broken privacy links,
weak screenshots,
poor onboarding,
can completely kill momentum.
Focus on:
product quality,
clear positioning,
App Store SEO,
and user experience.
That combination matters far more than chasing trends.
PS: I'll be sharing a reels video about this topic on my Instagram profile soon, make sure to follow @buildwithilyas